How to Effectively Use a Stud Finder for Home Projects in 2025
How to Effectively Use a Stud Finder for Home Projects in 2025
Understanding how to use a stud finder is crucial for successful home improvement projects. In 2025, as DIY enthusiasts and homeowners continue to embrace smart home tools, mastering this device can significantly enhance your construction and renovation efforts. From framing to hanging pictures, a reliable stud finder is an essential tool in achieving precision and safety.
Choosing the Right Stud Finder for Your Needs
When selecting a stud finder, it’s important to understand the various **stud finder types** available in the market today. There are two main categories to consider: **electronic stud finders** and **magnetic stud finders**. **Electronic stud finders** detect changes in wall density using radio waves or electrical signals, making them ideal for drywall where the stud spacing may be inconsistent. Meanwhile, **magnetic stud finders** utilize magnets to locate screws or nails in the studs, providing a simpler and often more affordable option suitable for quick tasks.
Understanding Stud Finder Features
When choosing a **stud finder for home improvement**, it’s essential to evaluate its features. Look for devices with a **visualization** display, sensitivity adjustments, and the ability to detect not just wood studs but also metal piping and electrical wires. Some advanced stud finders come equipped with **stud finder calibration** settings, which can enhance their accuracy depending on the wall material. If you’re in the market for a reliable stud finder, reading **stud finder reviews** can help ensure you make an informed choice based on others’ experiences.
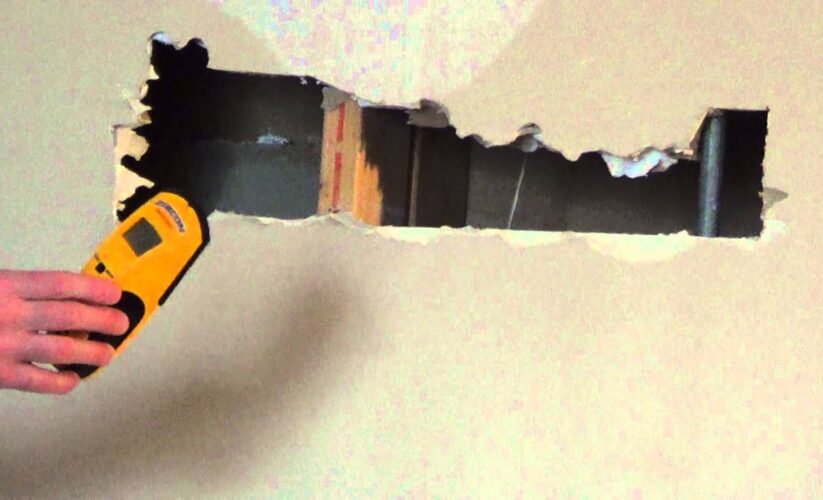
Using Stud Finders Appropriately
After selecting a stud finder, understanding how to use it correctly is vital. Begin by reading the specific **stud finder instructions** provided by the manufacturer. For most electronic models, you’ll need to calibrate the **stud finder function** before initiating a scan. Ensure your **stud finder is on a flat surface against the wall** and then press the start button. As you slide it along the wall, look for changes in the indicator light or sound to determine stud locations. Remember, incorrect usage may lead to inaccurate results, so be mindful of common **stud finder mistakes** when scanning.
Effective Stud Finder Techniques
To maximize the efficiency of your **stud finder**, implementing certain techniques can yield better results. One of the most effective techniques involves understanding the **stud spacing** in typical wall setups. In many cases, studs are spaced either 16 or 24 inches apart. Knowing this can help you identify more precise locations after your **ostensible finding** results appear.
Utilizing Advanced Stud Finder Tips
Advanced users might consider methods such as **measuring with a stud finder** to improve accuracy. Use the stud finder to identify the center of the stud and mark its edge to measure the distance between studs precisely. This is particularly useful when **hanging heavy items on walls** or constructing shelving. Understanding how to read your **stud finder results** accurately is critical; most electronic stud finders will indicate not just the presence of a stud but also display the edges, allowing for better placement of hardware.
Stud Finder Calibration and Maintenance
Calibrating your **stud finder** is crucial for ensuring optimal performance. Improper calibration may lead to false signals, resulting in misidentified studs. Most electronic stud finders have a calibration button or feature—carefully follow these prompts before usage. Additionally, practicing regular **stud finder maintenance**—like cleaning the sensor and checking the batteries—can prolong the device’s lifespan and performance.
Common Stud Finder Issues and Troubleshooting
While using a stud finder, you might encounter some common obstacles. One frequent issue is the presence of **electrical wires behind walls**, which can significantly affect **stud finder accuracy** by causing false positives. To avoid this, always check local safety codes and guidelines regarding electrical installations. Furthermore, if you’re using a **magnetic stud finder**, remember that it can be less effective on walls with thicker finishes or non-ferrous fasteners.
Tips for Troubleshooting Stud Finder Problems
If your **stud finder** is providing inconsistent results, consider troubleshooting potential issues. Start by ensuring the wall is clean, as dust or uneven surfaces might interfere with performance. If prompted **stud finder troubleshooting**, recalibrate the device and make sure you are maintaining the correct scanning angle. If problems persist, consult product-specific guidelines for service options or consider investing in a more advanced model.
Best Practices for Stud Finding
Employing best practices for using a stud finder can make all the difference in achieving successful results. One best practice is to always double-check your findings by making measurements across the suspected stud area. Use a tape measure to confirm spacing and experiment with different **stud finder applications** as you work. Additionally, familiarizing yourself with different wall types and how they respond to various stud finder functions can further enhance accuracy and craftsmanship.
Key Takeaways
- Understand the differences between **electronic** and **magnetic stud finders** to select the right tool for your project.
- Implement calibrated techniques for better measurement accuracy when using a **stud finder**.
- Troubleshooting common problems effectively can enhance your DIY results and expert abilities.
- Regular maintenance of your **stud finder** ensures longevity and continued precision.
FAQ
1. What is the best stud finder type for beginners?
For those just starting out, a **magnetic stud finder** is often the best choice due to its simplicity and low cost. It helps beginners learn the basics of locating studs without the complexity of electronic options, making it easier to grasp fundamental wall scanning techniques.
2. How can I enhance the accuracy of my stud finder?
To improve the accuracy of your stud finder, regularly calibrate the device before use on different wall types, keep it clean, and carefully observe indicators while moving across the wall. Familiarizing yourself with typical stud spacing will also enhance overall effectiveness.
3. Are there alternatives to stud finders?
While stud finders are reliable, alternatives include the knocking method—which involves knocking on the wall while listening for sound differences to locate studs. Additionally, you can use a measuring tape to find studs based on standard spacing left from old construction techniques.
4. What should I do if my stud finder gives false readings?
If your stud finder shows inconsistent results, recalibrate it and ensure you’re applying the correct scanning technique. Sometimes, extensive wall materials like tile or thick paint can impact readings, so testing in various locations might yield better results.
5. Can stud finders detect electrical wiring?
Many electronic stud finders can detect live electrical wiring behind walls, but it’s essential to check the specifications of your particular device. Be cautious and adhere to safety guidelines when scanning to prevent accidents or damage.
For further reading and resources on improving your home project skills, visit here and explore various techniques and tools.

